

A Wi-Fi printer that won’t connect can be frustrating, especially when you need to print something urgently. The problem may be with the printer’s wireless settings, your Wi-Fi network, the router or the computer you’re printing from.
Work through the checks below in order. Start with the simple solutions before changing network settings or reinstalling printer software.
These steps apply to many wireless printers, including HP, Canon, Epson and Brother models. The exact menu names may vary depending on your printer.
Before you begin: Make sure the printer is switched on and has no paper jam, ink warning or other error displayed on its screen.
1. Check whether your printer is connected to Wi-Fi
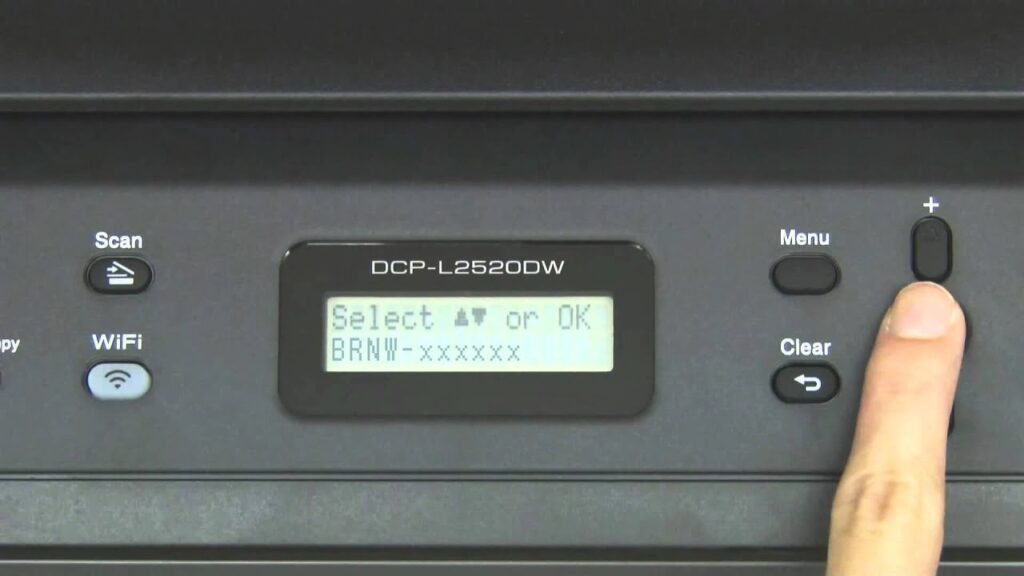
Start by checking the wireless connection on the printer itself. A printer may be switched on and working correctly but disconnected from your home or office network.
- On the printer’s screen, open Settings, Network Settings or Wireless Settings. The wording varies between models.
- Look for Wi-Fi Status, Network Status or a similar option.
- Check whether the printer reports that it is connected to your wireless network.
- If it is disconnected, use the printer’s wireless setup menu to select your Wi-Fi network and enter the correct password.
- If the printer offers to print a network configuration or wireless status report, print one to check the connection details.
If your printer cannot find your Wi-Fi network, or the password is rejected, don’t keep guessing. Check that you’re selecting the correct network and entering the password accurately.
2. Check that your printer and computer are on the same Wi-Fi network
Your printer and computer usually need to be connected to the same local network to find and communicate with each other.
For example, your computer might be connected to your home Wi-Fi while your printer is still connected to an old router or a different network.
On your printer:
- Open the wireless or network settings and check the name of the connected Wi-Fi network.
On your Windows computer:
- Click the Wi-Fi or network icon near the clock on the taskbar.
- Check the name of the connected network.
- Compare it with the network name shown on your printer.
If the network names are different, connect the printer or computer to the correct network.
Also check: If your computer or printer is connected to a guest Wi-Fi network, the router may prevent devices on that network from communicating with each other. Try connecting both devices to your normal home or office network, if appropriate.
If both devices are on the same network but the printer still won’t connect, continue to the next check.

3. Check whether your printer supports 2.4 GHz Wi-Fi
Some wireless printers support only the 2.4 GHz Wi-Fi band, while many modern routers provide both 2.4 GHz and 5 GHz Wi-Fi. If your printer cannot use the network or band you’re trying to connect it to, setup may fail.
Here’s what to check:
- Look in your printer’s manual or specifications to see which Wi-Fi bands it supports.
- Check your router’s Wi-Fi settings to confirm that the supported band is enabled.
- If your router uses separate Wi-Fi names for 2.4 GHz and 5 GHz, try connecting the printer to the 2.4 GHz network if the printer requires it.
- Connect your computer or phone to the appropriate home network and try adding the printer again.
What if your router uses one Wi-Fi name for both bands?
Many routers automatically manage the 2.4 GHz and 5 GHz bands under a single network name. This is often called band steering or Smart Connect.
Don’t change these settings straight away. First, check the printer manufacturer’s instructions or your router’s documentation. If the printer still cannot connect, the router may need a setting adjusted to make setup possible.
Some internet providers’ routers have additional wireless settings that can affect printer connections. For example, if you use a Telstra modem, see our guide to problems adding a Wi-Fi printer to a Telstra modem.
If you use Starlink internet and your printer is having connection problems, see our guide to problems connecting a printer to Starlink.

4. Check the printer settings in Windows
If your printer is connected to Wi-Fi but won’t print, Windows may have paused the printer, selected the wrong device or left documents waiting in the print queue.
Try these checks on your Windows 11 computer.
Check that the correct printer is selected
- Open Start and select Settings.
- Select Bluetooth & devices, then Printers & scanners.
- Find your printer in the list and select it.
- Check that it is the printer you want to use and that Windows recognises it.
If your printer isn’t listed, select Add device and follow the instructions to search for available printers.
Check for stuck print jobs
- Open your printer’s settings and select Open print queue, if available.
- Look for documents that are stuck or showing an error.
- If a document is no longer needed, cancel that print job.
- Check whether the printer has been paused or set to work offline. If so, restore normal printing where those options are available.
Menu names can vary depending on your printer and Windows version.
Try printing a test page or a simple document. If the printer still doesn’t respond, continue to the next step.

5. Restart your printer, computer and router
A temporary network problem can prevent a wireless printer from communicating with your computer. Restarting the devices can sometimes restore the connection.
Follow these steps in order.
- Restart the printer. Switch it off, wait about 30 seconds, then switch it back on. Allow it to finish starting up and reconnecting to Wi-Fi.
- Restart your computer. Save any open work first, then restart Windows.
- Check the connection again. Try printing a test page or a simple document.
If the printer still won’t connect, you may need to restart your router.
Should you restart your router?
Before restarting your router, make sure nobody is relying on the internet for an important call, meeting or other activity.
If it is safe to do so, follow your internet provider’s instructions to restart the router. Wait until the internet connection and Wi-Fi have returned before trying to print again.
Important: Use the router’s normal restart procedure. Don’t press the factory reset button, as this can erase your internet and Wi-Fi settings.
If other devices have also lost their internet connection, the problem may be with the router or internet service rather than the printer alone.
6. Update or reinstall your printer software
If your printer is connected to Wi-Fi but Windows still cannot find it or send print jobs, the printer driver or software may be causing the problem.
A driver helps Windows communicate with your printer. An outdated, missing or incompatible driver can cause printing problems.
Check for a printer driver update
- Visit the official website of your printer’s manufacturer, such as HP, Canon, Epson or Brother.
- Find the support or downloads section.
- Search for your exact printer model.
- Check that the driver or software is compatible with your version of Windows.
- Follow the manufacturer’s installation instructions.
Avoid downloading printer drivers from unfamiliar websites or third-party driver-updater programs.
Should you remove and reinstall the printer?
If updating the driver doesn’t help, you can try removing the printer from Windows and adding it again.
- Open Settings in Windows.
- Select Bluetooth & devices, then Printers & scanners.
- Select your printer and choose Remove, if that option is available.
- Restart the computer if necessary.
- Select Add device and follow the instructions to add the printer again.
Important: Before removing the printer, make sure you know how to reconnect it to Wi-Fi and have access to the manufacturer’s setup instructions. If your printer is part of a business network or has specialised scanning software, check the manufacturer’s guidance before removing it.
If Windows still cannot find the printer, continue to the final troubleshooting checks below.
7. Still can’t connect your Wi-Fi printer?
If your printer still won’t connect, run through this final checklist:
- Check the printer’s Wi-Fi status: Confirm it is connected to your intended wireless network.
- Check the network: Make sure the printer and computer can communicate on the same local network.
- Check Wi-Fi compatibility: Confirm that your printer supports the wireless band you are using.
- Check Windows: Look for stuck print jobs, offline status or an incorrect printer selection.
- Check the software: Make sure you have the correct printer driver for your model and version of Windows.
- Check other devices: If several devices have lost their connection, investigate the router or internet service.
If the printer works from one device but not another, the problem may be with the computer or its printer settings rather than the printer itself.
If it cannot connect to Wi-Fi at all, the printer’s wireless settings, compatibility or the router may need further investigation.
Need help setting up your printer?
If you’ve tried these steps and your printer still won’t connect, iTech WA can help with printer setup, Wi-Fi connectivity and home or small-business networking in Bridgetown and the surrounding South West.
Visit our Printer Setup service page or learn more about our Wi-Fi and Networks services.
Need help with your computer or technology?
iTech WA provides friendly, professional IT support for homes and small businesses in Bridgetown and the South West.
With more than 40 years of IT experience, I provide practical, plain-English advice and personal service.
Friendly, professional IT support that comes to your door.

